

You may have heard of the words “FileVault” and “encryption” relating to your Mac’s hard drive, and you may be wondering if you should use this higher level of security and if it is easy to implement. The answer to all of this is “yes”. Even though you’ve already protected your Mac with a login password, you can encrypt your Mac’s hard drive and take your safety and security to a whole new level.
How does Encryption work?
Encryption is industrial-level protection for your drive, such that probably no one, short of the NSA, would be able to retrieve your data should your device be lost or stolen. Apple has really improved their full-disk encryption in the last years (known as FileVault) so that it is easy to set up, and using it is basically transparent to the user.
About the only difference a user will notice is that upon boot-up, you will be asked for your login password right away, as that is required to unencrypt the entire drive.
- Choose Apple menu > System Preferences, then choose Security & Privacy.
- Click the FileVault tab.
- Then click the padlock in the lower left corner, and enter an administrator name and password.
- Click the “Turn On FileVault” button.
If other users have accounts on your Mac, you might see a message that each user must type in their password before they will be able to unlock the disk. For each user, click the Enable User button and enter the user’s password. OS X automatically enables any user accounts that you add after turning on FileVault.
Choose how you want to be able to unlock your disk and reset your password, in case you ever forget your password:
- If you’re using OS X 10.9 or newer, you can choose to store a FileVault recovery key with Apple by providing the questions and answers to three security questions. Choose answers that you’re sure to remember.
- If you’re using OS X 10.10 or later, you can choose to use your iCloud account to unlock your disk and reset your password (I recommend this choice).
- If you don’t want to use iCloud FileVault recovery, you can create a local recovery key. Keep the letters and numbers of the key somewhere safe—other than on your encrypted startup disk.
IMPORTANT: If you lose or forget both your OS X account password and your FileVault recovery key, you won’t be able to log in to your Mac or access the data on your startup disk.
When FileVault setup is complete, your Mac restarts and asks you to log in with your account password. Your password unlocks your disk and allows your Mac to finish starting up. FileVault requires that you log in every time your Mac starts up, and no account is permitted to log in automatically.
After your Mac starts up, encryption of your startup disk occurs in the background as you use your Mac. This takes time, and it happens only while your Mac is awake and plugged in to AC power. You can check progress in the FileVault section of Security & Privacy preferences. Any new files that you create are automatically encrypted as they’re saved to your startup disk
Encrypting Your Backup Drive
In addition to encrypting your hard drive, you can also encrypt your backup drive(s). (If you have an existing backup drive, skip to the next section.)
- Launch System Preferences by selecting the System Preferences item from the Apple menu.
- Select the Time Machine preference pane.
- In the Time Machine preference pane, click the Select Backup Disk button.
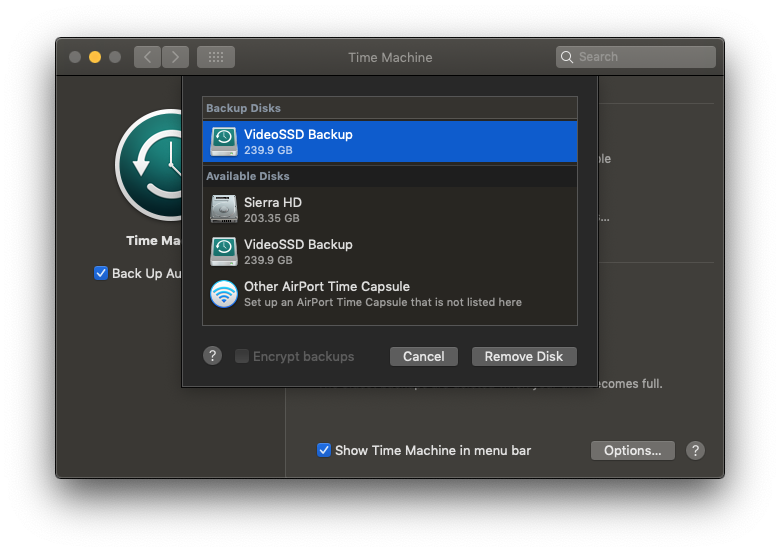
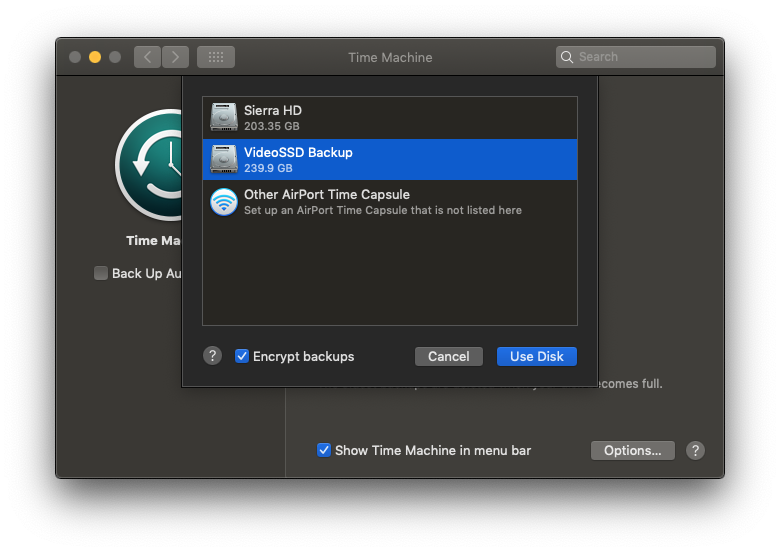
- In the drop-down sheet which displays available drives that can be used for Time Machine backups, select the drive you wish Time Machine to use for its backups.
- At the bottom of the drop-down sheet, you’ll notice an option labeled Encrypt backups. Place a checkmark here, and then click the Use Disk button.
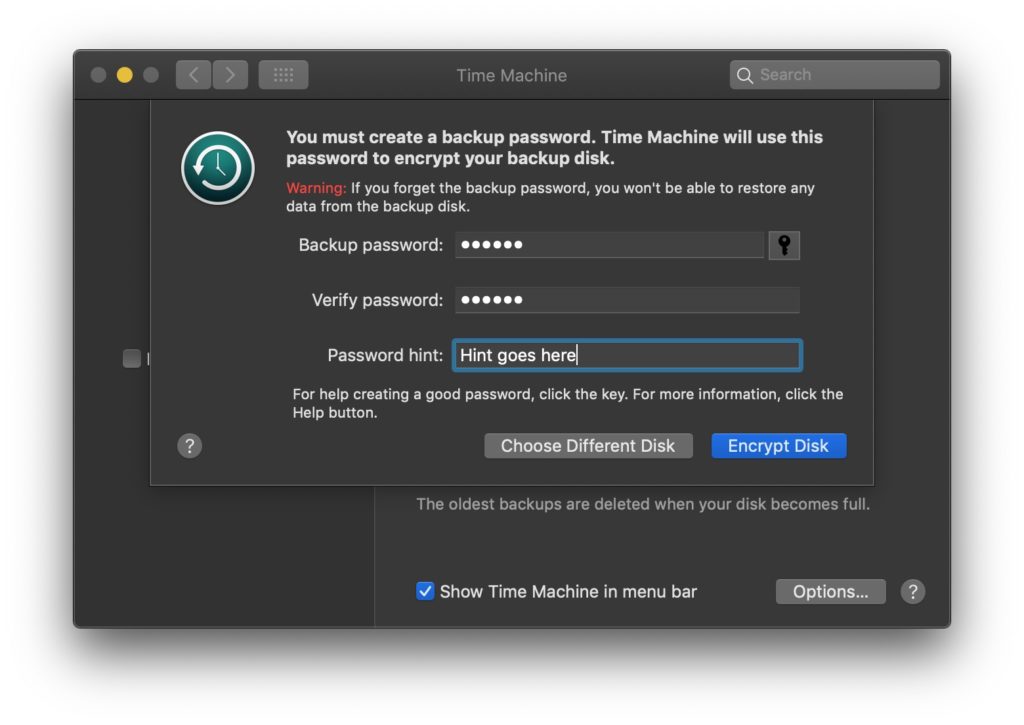
- A new sheet will appear, asking you to create a backup password. Enter the backup password, as well as a hint for recovering the password. When you’re ready, click the Encrypt Disk button.
- Your Mac will start encrypting the selected drive. This can take quite a while, depending on the size of the backup drive. Expect anywhere from an hour or two to a whole day.
- Once the encryption process is complete, your backup data will be secure from prying eyes, just like your Mac’s data.
What if I already have a backup drive?
If you have an existing (unencrypted) drive that you want to convert to being encrypted, follow these steps first:
In System Preferences:Time Machine, click on the “Select Drive” button. Highlight your existing drive and press the “Remove Disk” button.
Once you’ve done that, then press the “Select Drive” button again. This time select that same drive, but also check the checkbox that says, “Encrypt backups”.
If your Mac complains and says that it cannot encrypt the drive, then you will need to use Disk Utility to erase the drive first, and then start from the beginning.
Wait – I think I need some help…
That is why we are here, to help you with every step of this if you want. Contact us and we will get it done for you!